Getting Started
Anopa connects your Framer project to a live Shopify storefront using the Shopify Storefront API. Before placing any components on the canvas, you need to complete two things: create a Headless sales app in your Shopify admin to generate a Storefront API access token, then enter that token and your store domain into the Anopa plugin panel in Framer.
This guide covers the Shopify side of that setup.
Prerequisites
- A Shopify store on any plan (Basic or above)
- Admin access to that store
- The Anopa plugin installed in your Framer project
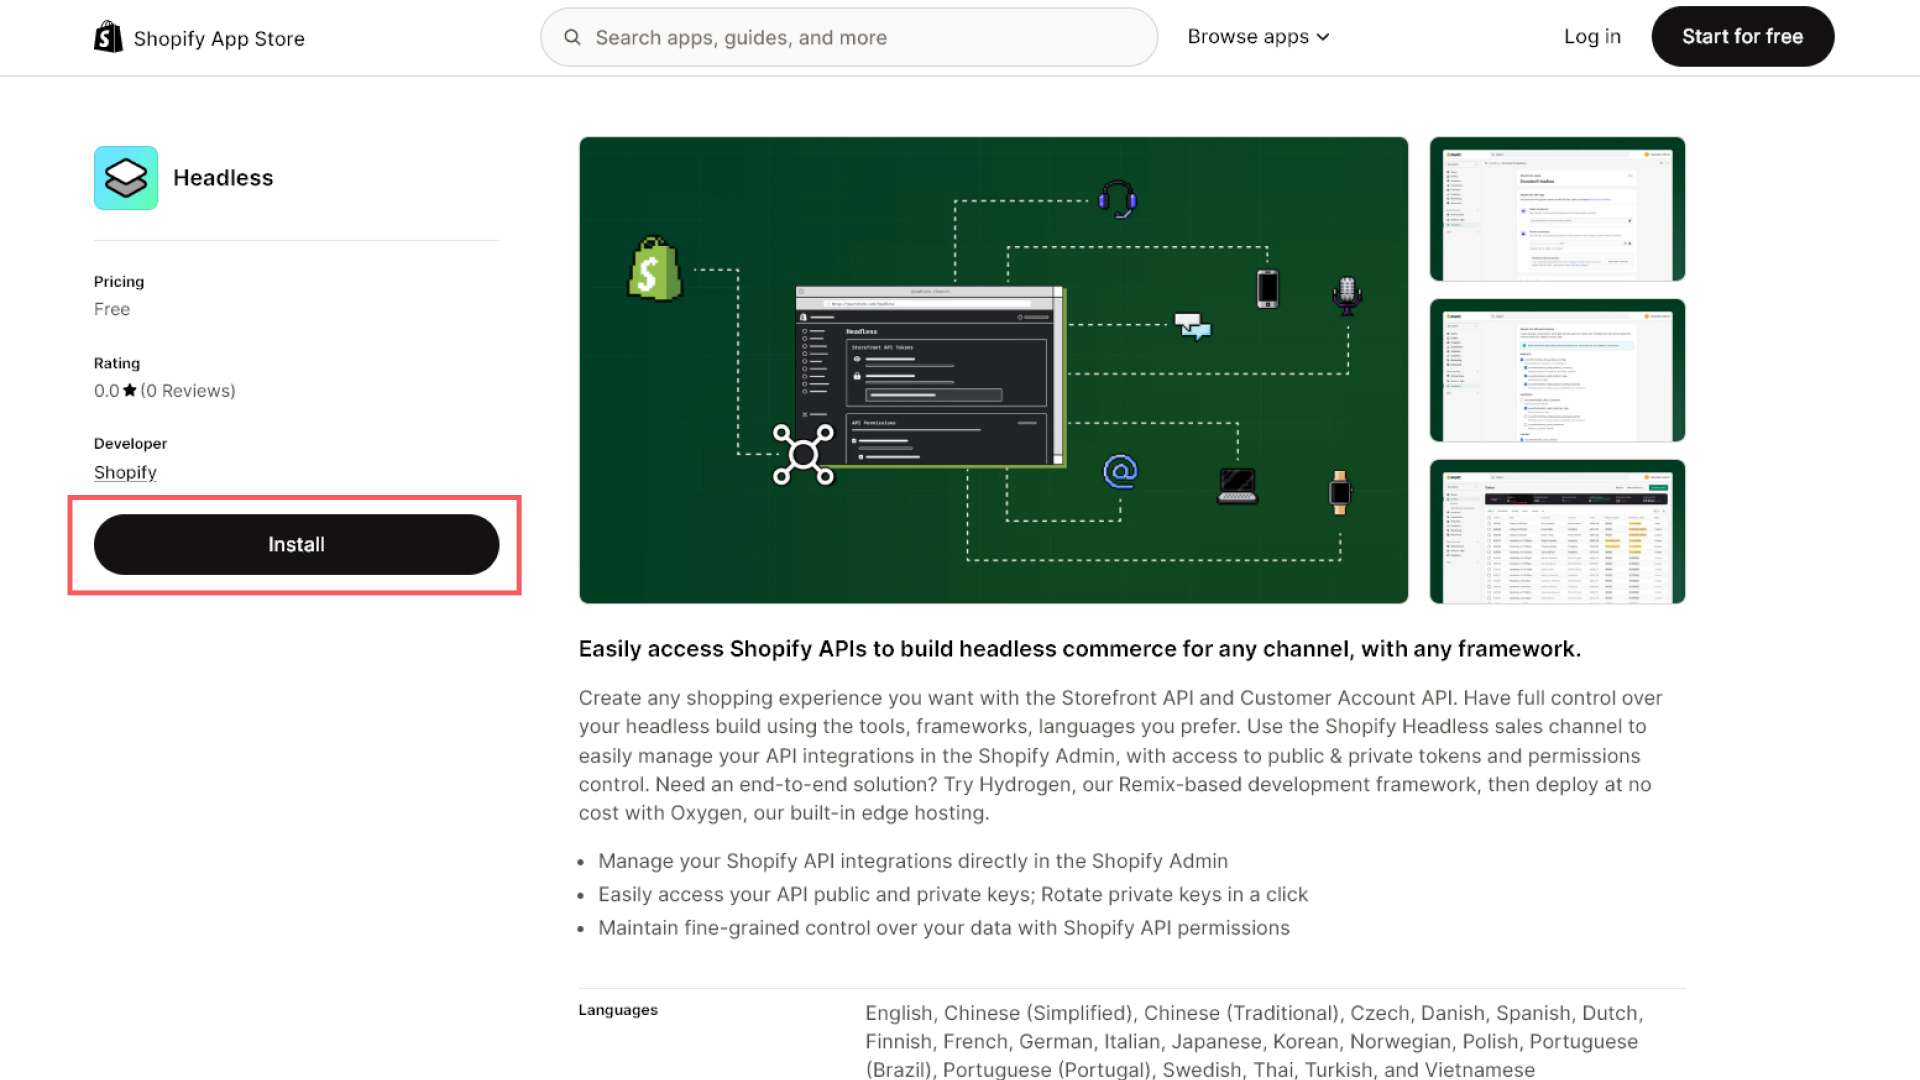
Step 1 — Add the Headless App
Install the Shopify's Headless sales app to generate a Storefront API token.
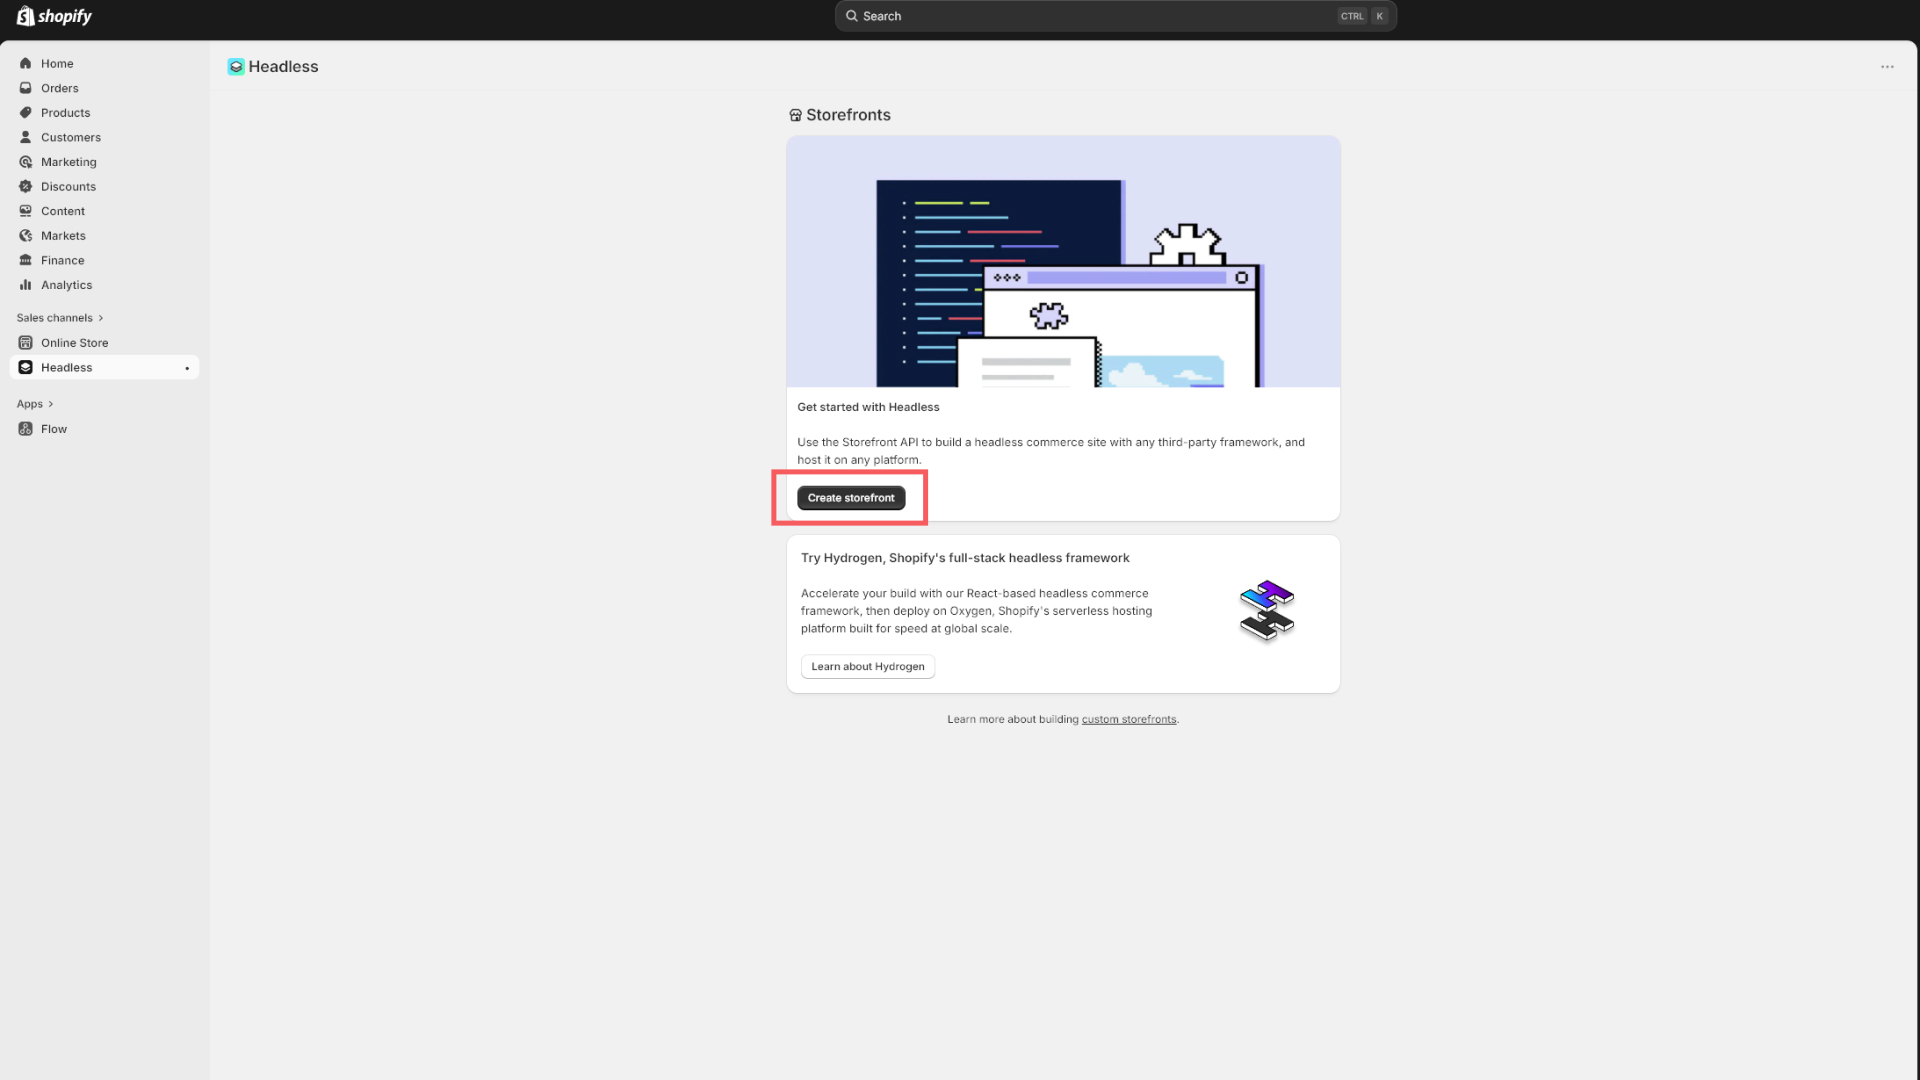
Step 2 — Create a Storefront API Token
Click on create storefront from the headless app.
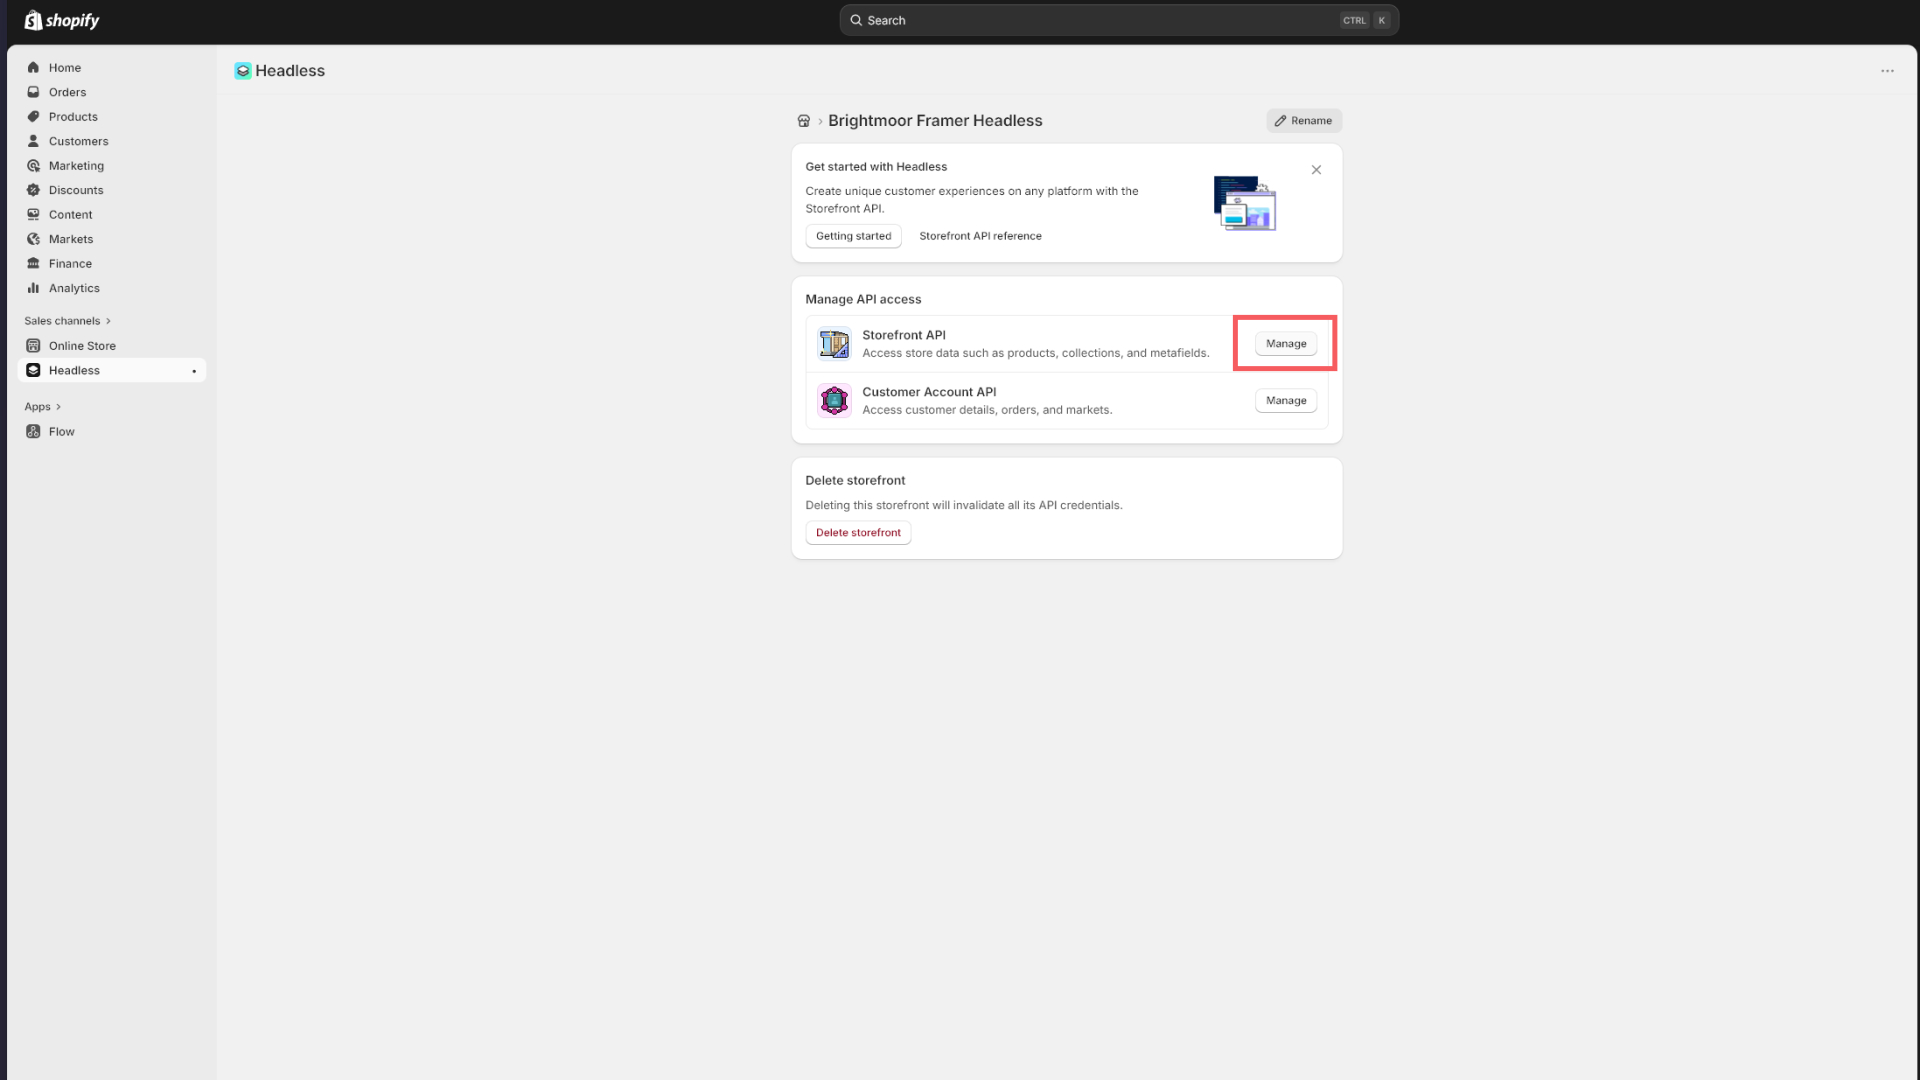
Step 3 — Manage Access Token & Permissions
Click on mange to access your token and permissions.
Step 4 — Edit Permissions
Click on edit to edit the permissions, keep everything that is there and allow access to this:
unauthenticated_read_product_listings

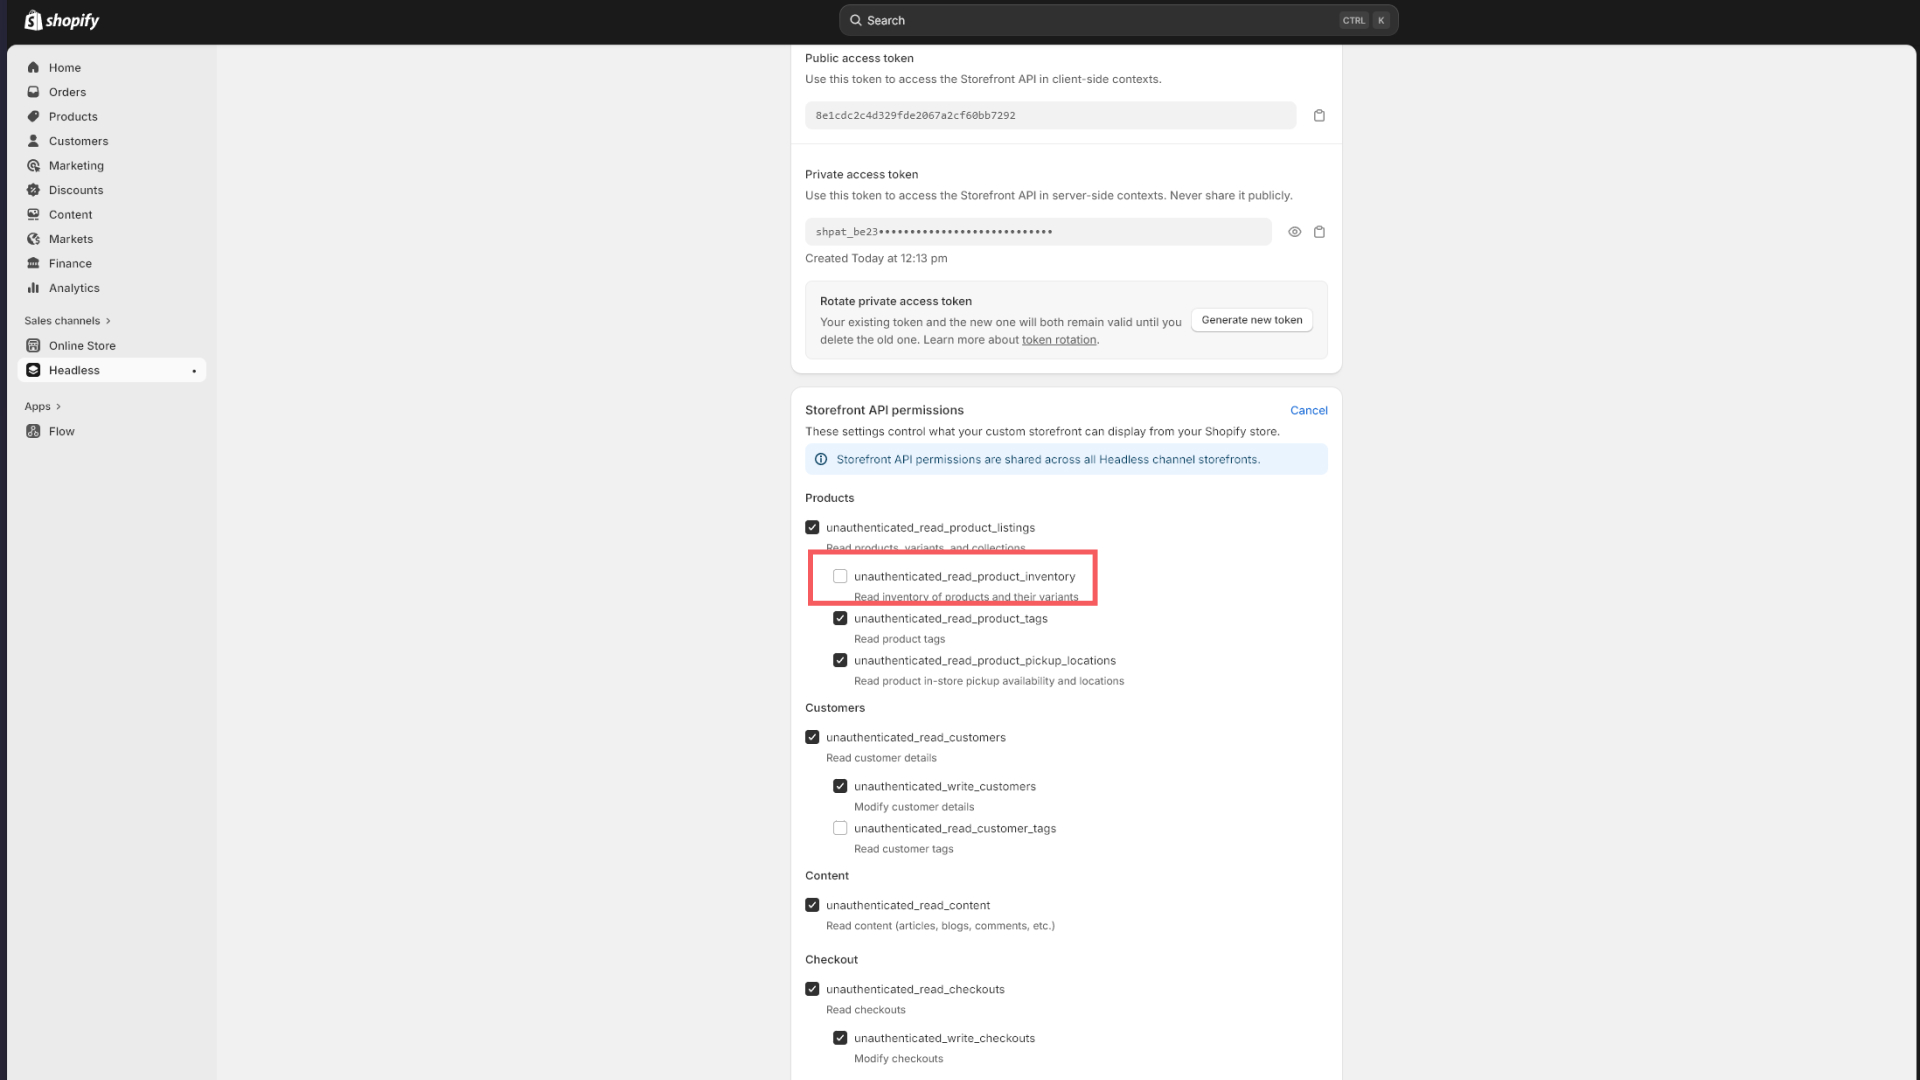
Step 5 — Save
Click on save to save the permissions.
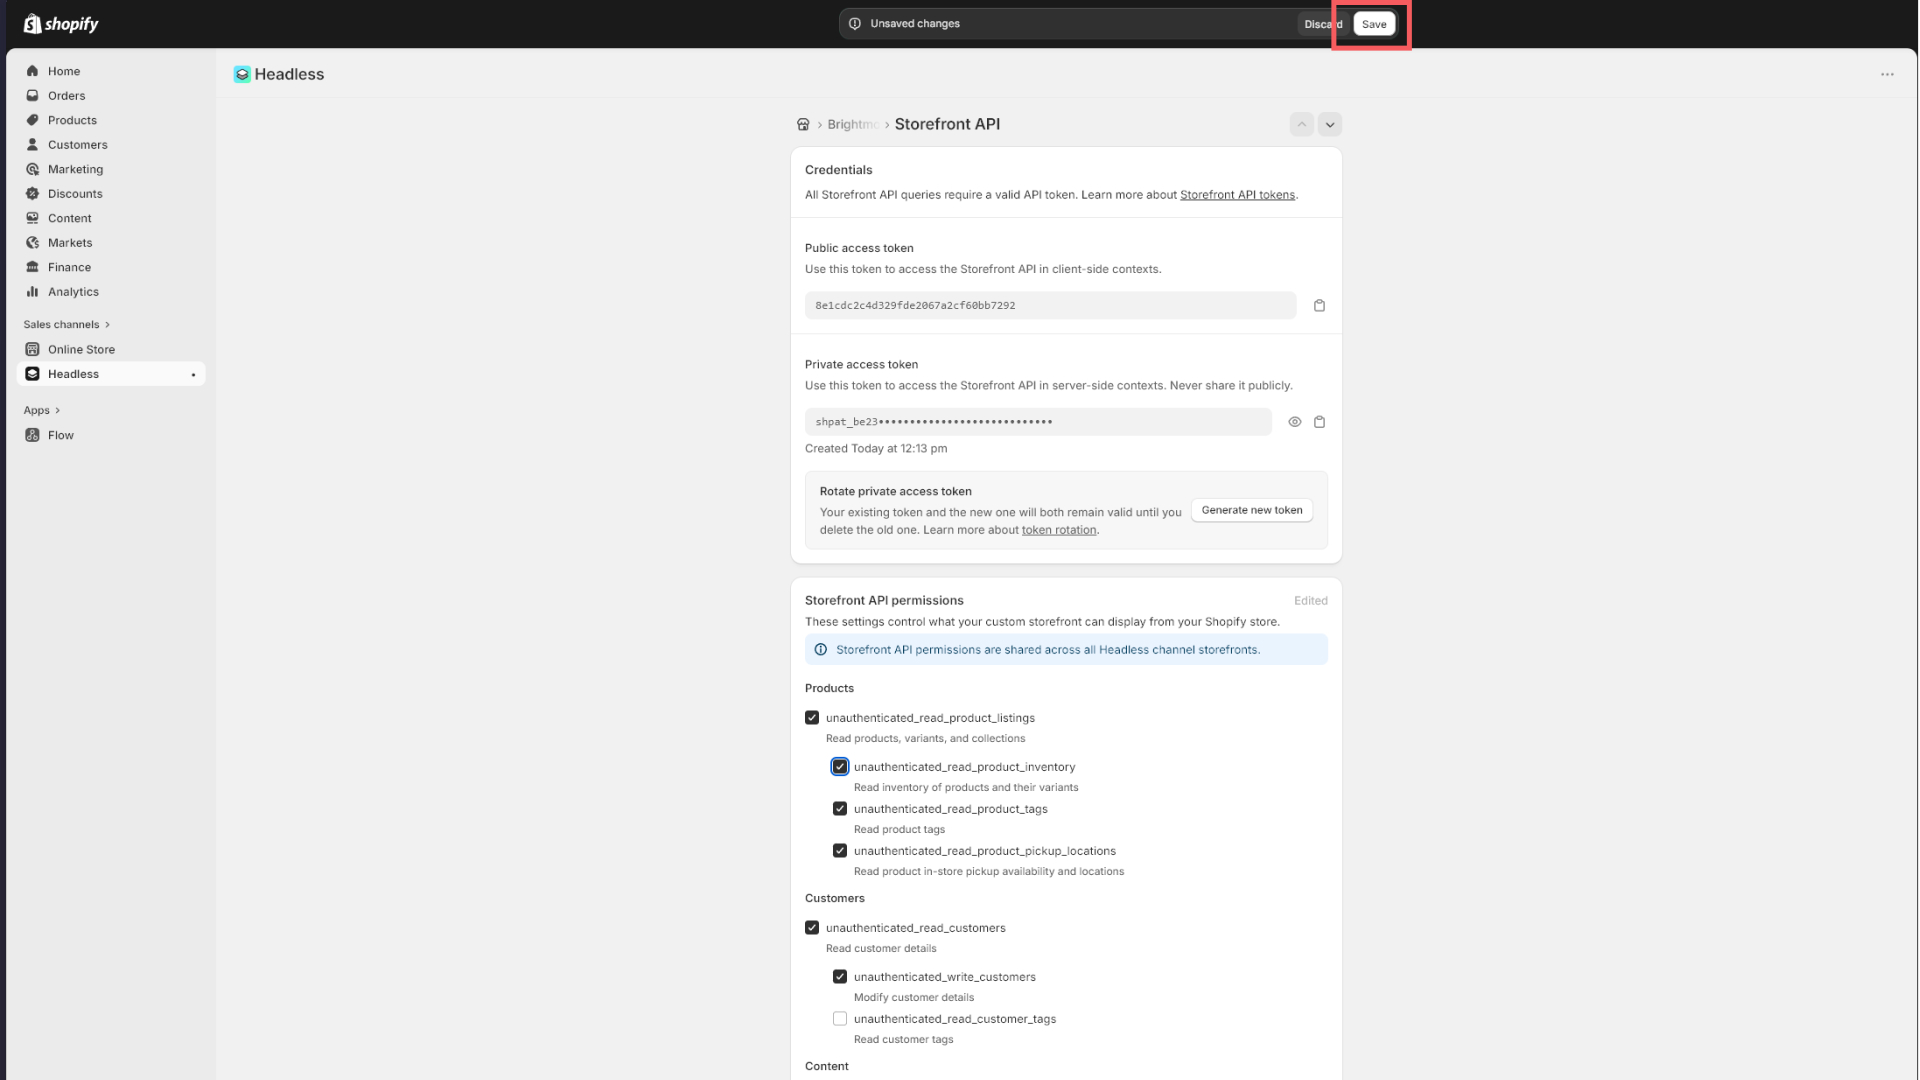
- Click Save.
Your Storefront API token is a public token. It is safe to use in a client-side Framer project and does not grant write access to your admin, products, or orders.
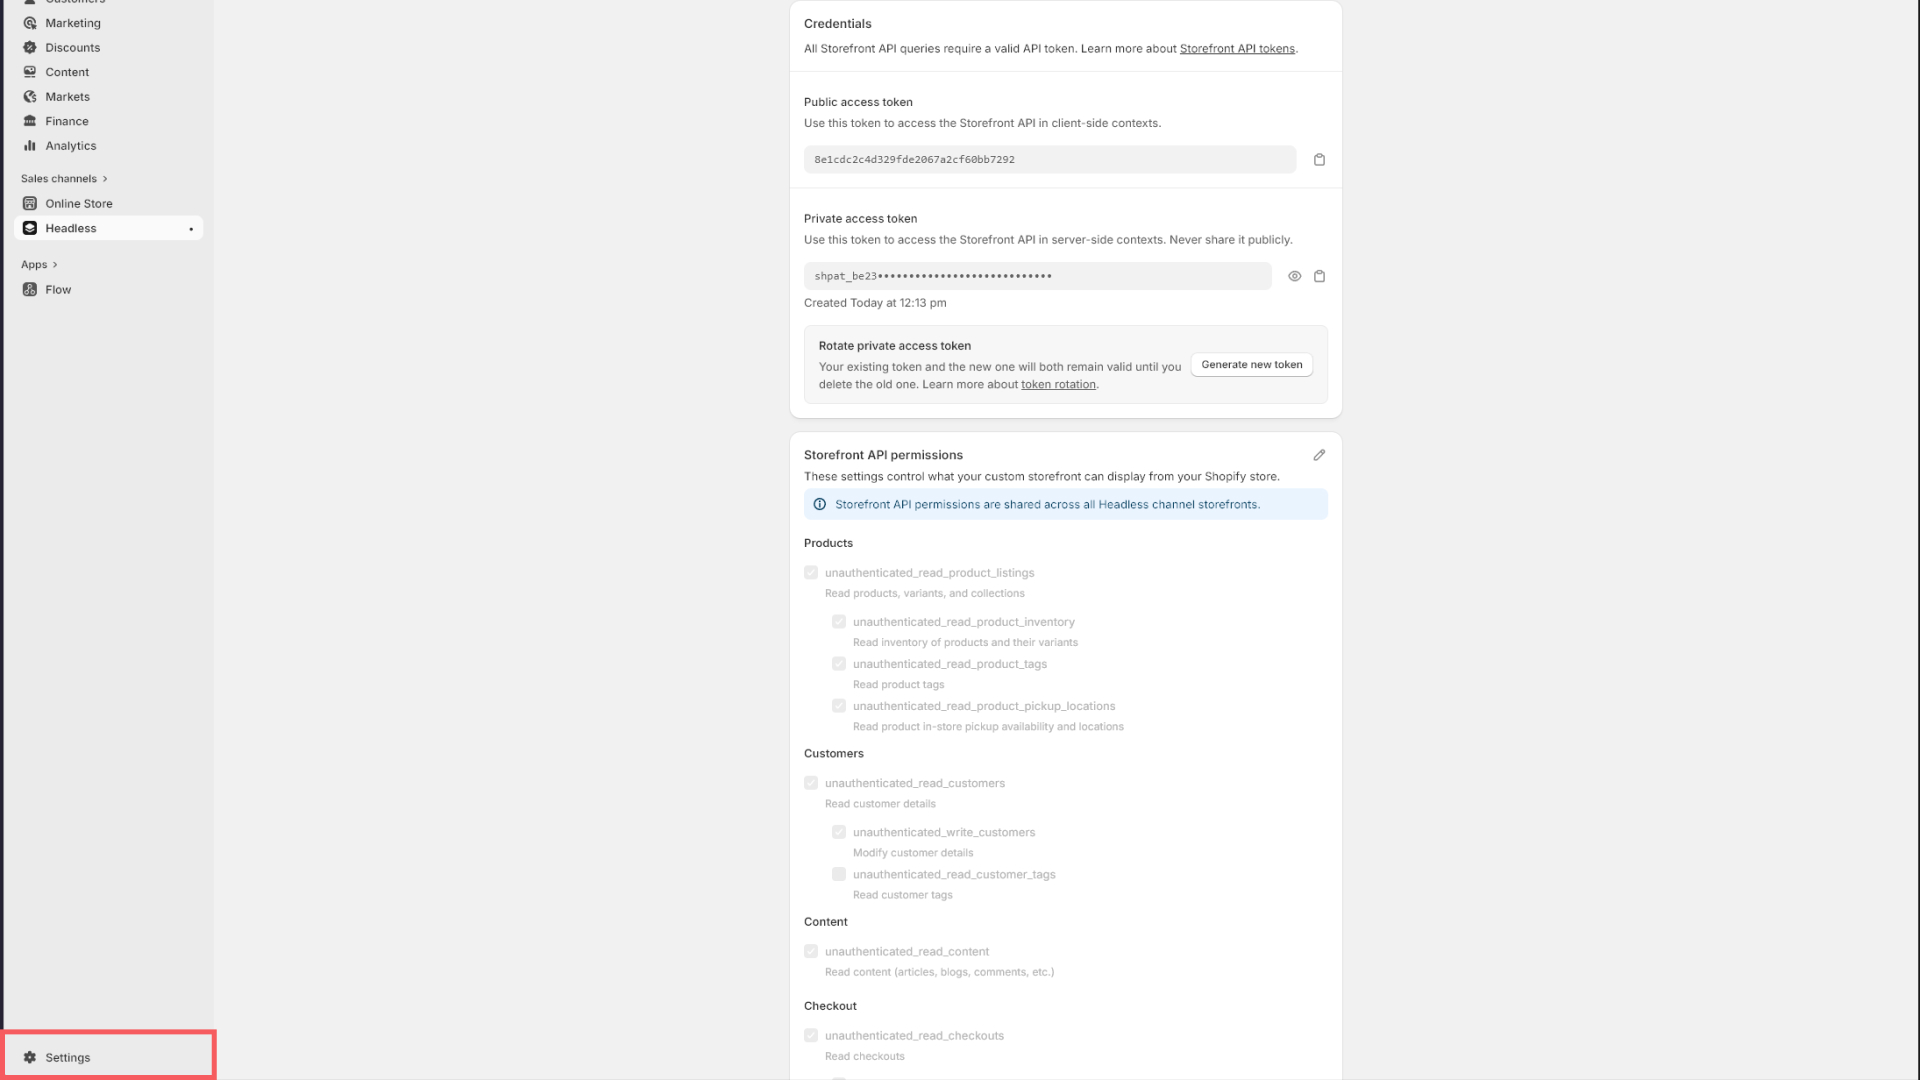
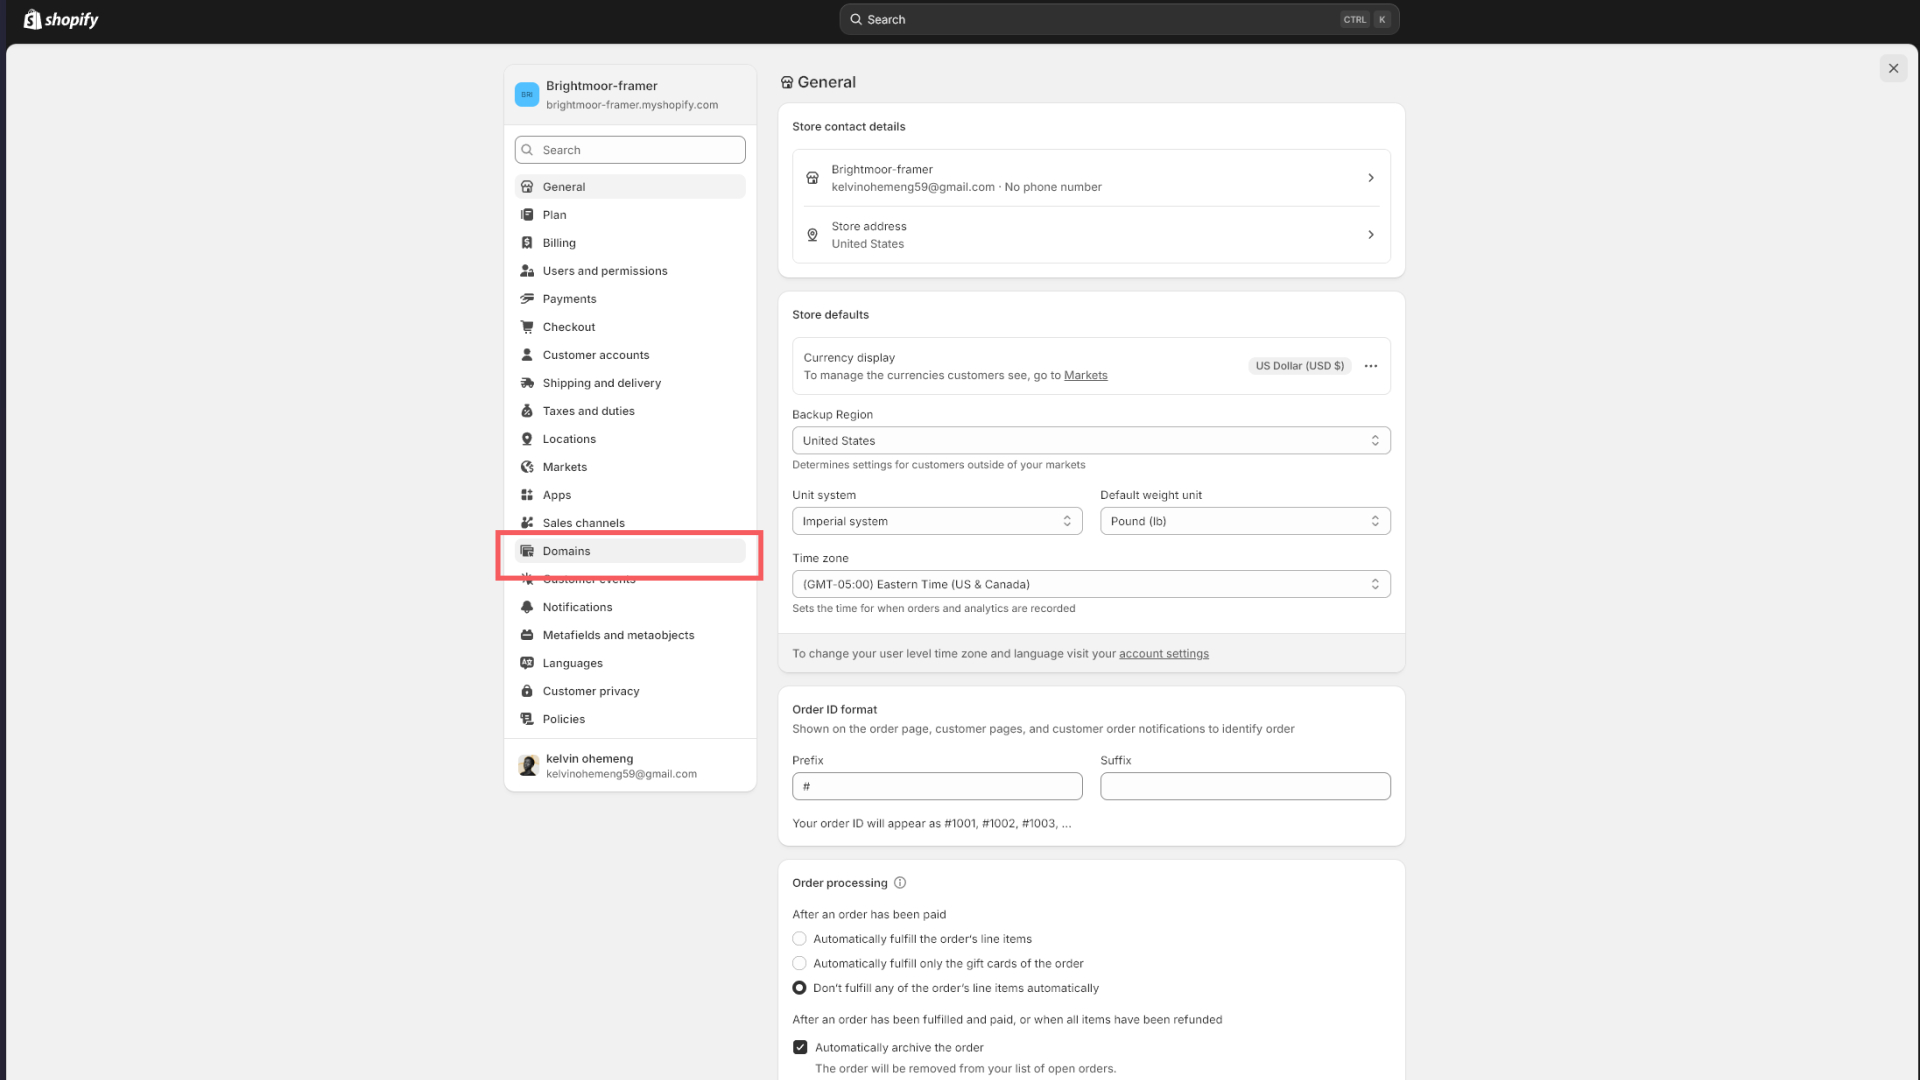
Step 6 — Find Your Store Domain
Your store domain is the .myshopify.com address of your store, not a custom domain you may have set up.
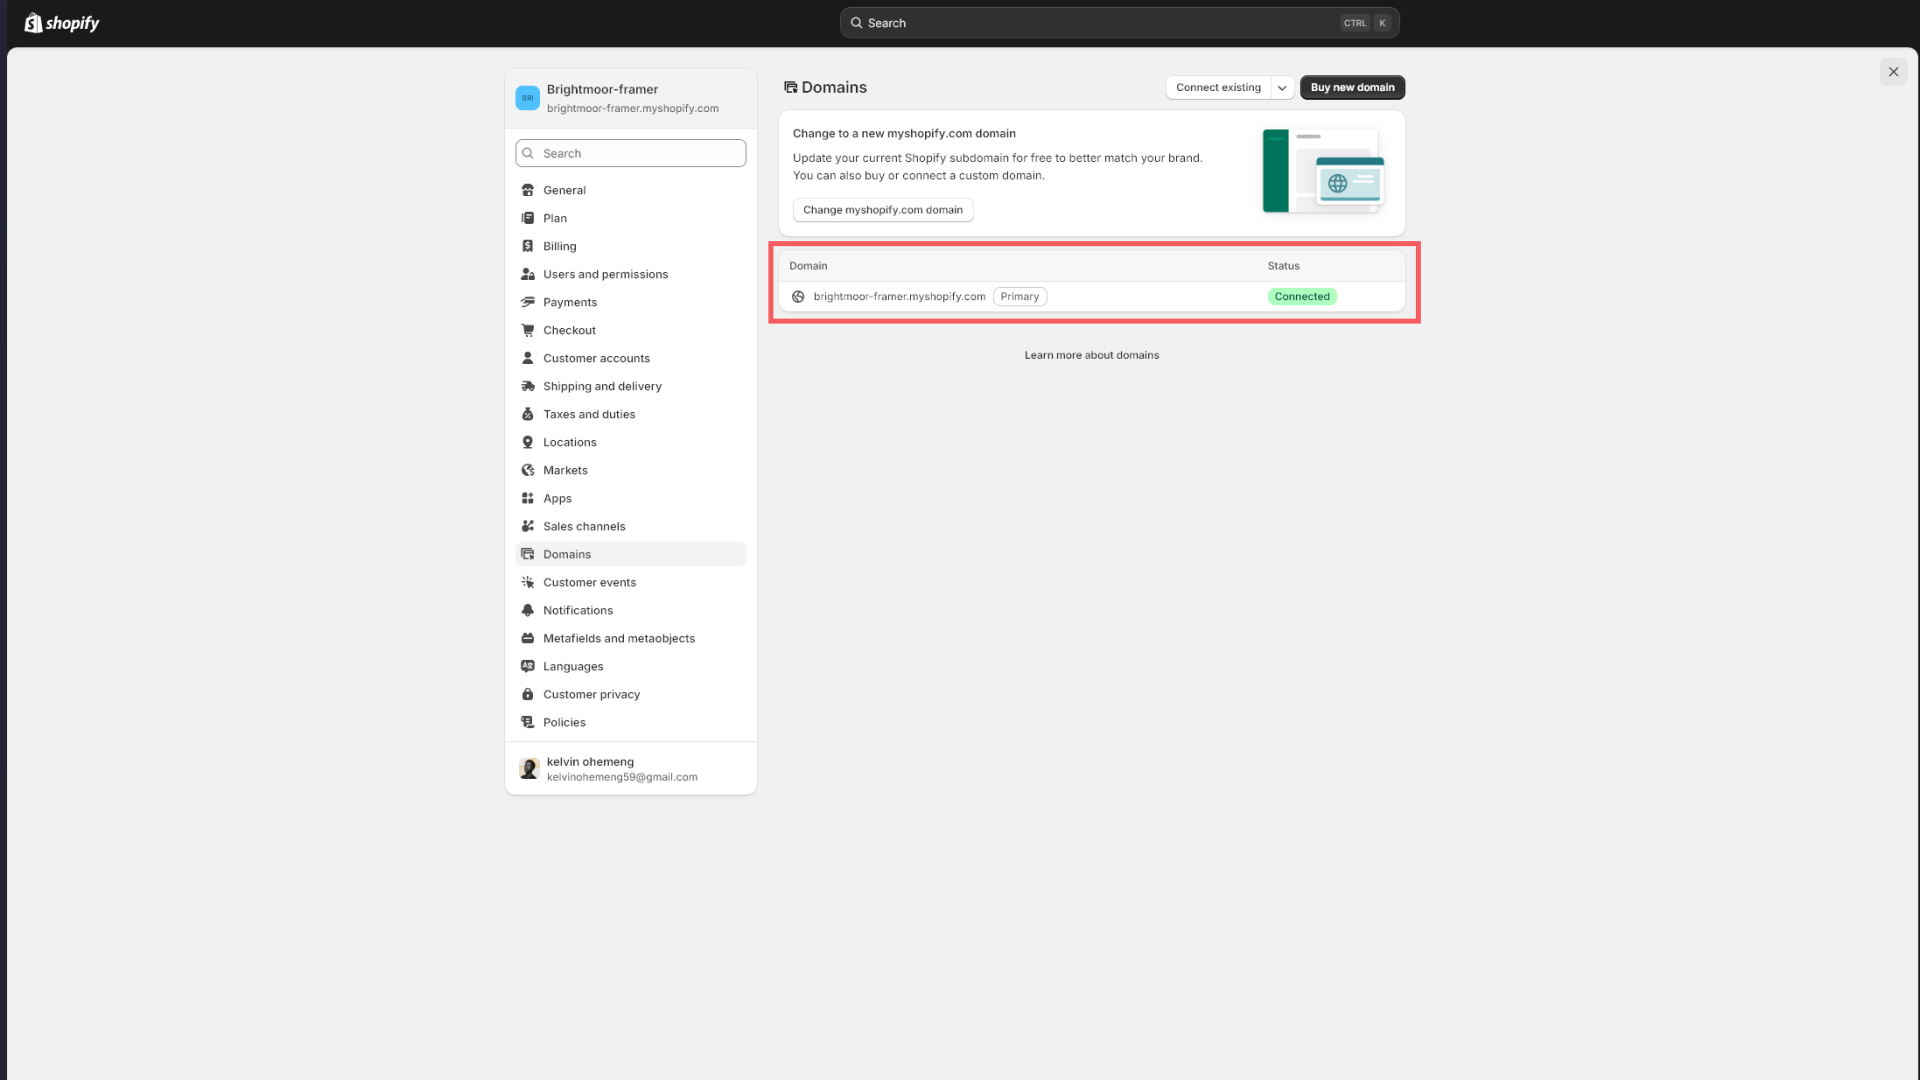
You can find it in Shopify Admin → Settings → Domains. It looks like:
your-store-name.myshopify.com
Copy this value exactly as shown, without https:// or a trailing slash.
Step 4 — Enter Your Credentials in Framer
With your Storefront API token and store domain ready:
- Open your Framer project.
- Click the Anopa plugin icon in the Framer toolbar to open the plugin panel.
- Paste your Store Domain into the Store Domain field.
- Paste your Storefront API Token into the API Token field.
- Click Save (or Connect, depending on your version).
Anopa will verify the connection and confirm your store is live. Once connected, all Anopa components on the canvas will begin reading from your Shopify storefront.
Troubleshooting
"Could not connect to store"
Double-check that your store domain is in the format your-store.myshopify.com with no https:// prefix and no trailing slash.
Products not loading Make sure the Headless storefront is not paused. In the Headless app, check that the storefront status is Active.
API token not working Tokens generated from the Headless app are specific to that storefront. If you deleted and recreated the storefront, you need to generate a new token and update it in the plugin panel.
Missing scopes If cart or checkout functionality is not working, revisit the storefront permissions in the Headless app and confirm all six scopes listed in Step 2 are enabled.
Next Steps
With your store connected, you are ready to start building. Continue to the next section to learn how to set up your Framer CMS, connect product data, and place Anopa components on your pages.